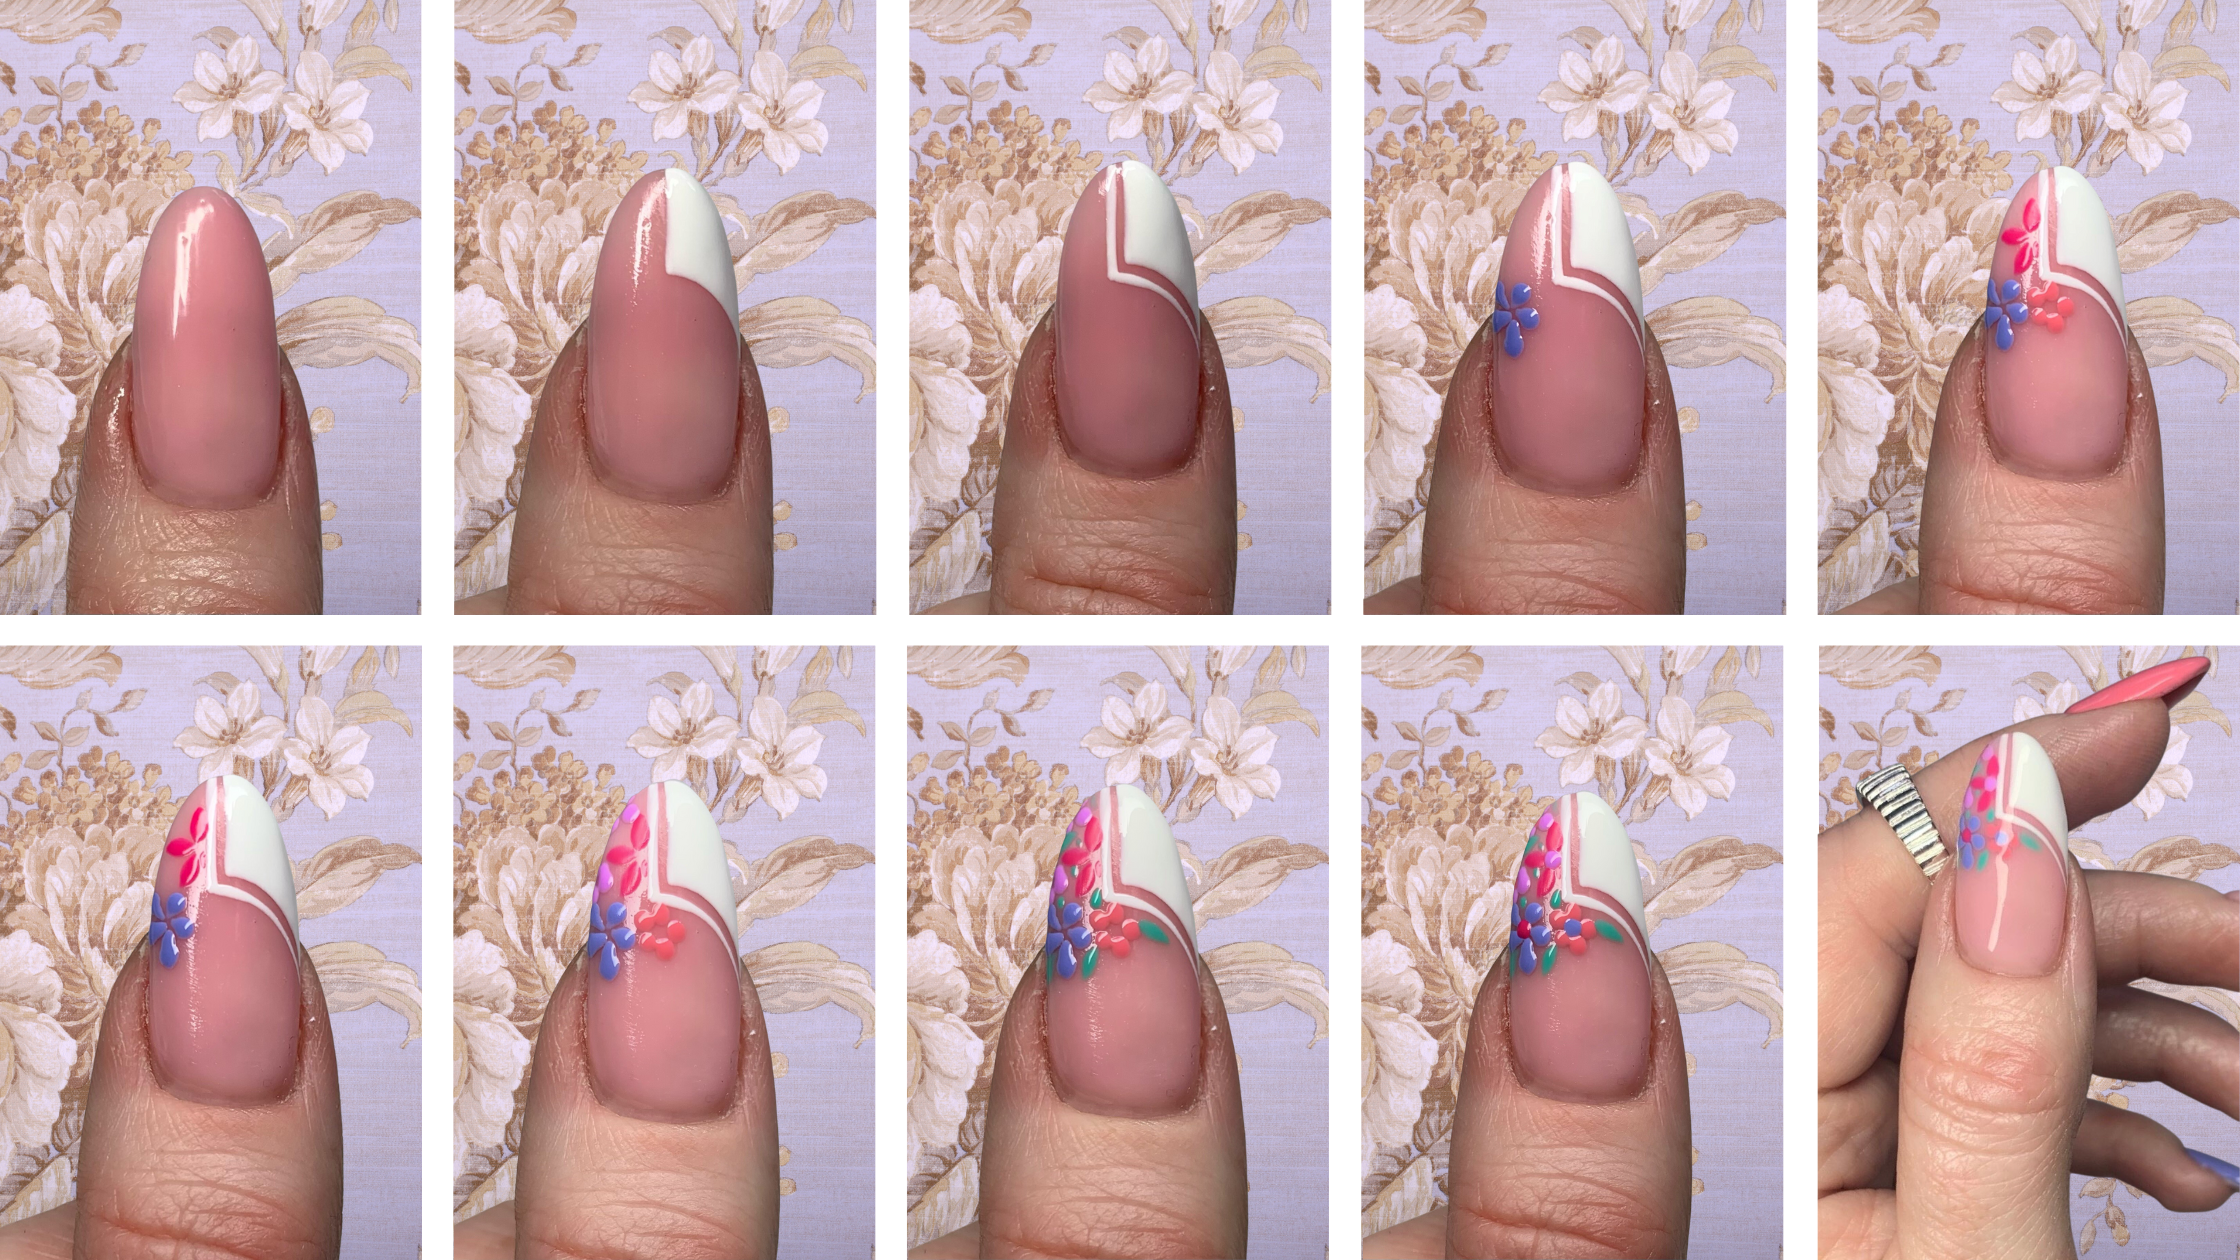
How To: French Floral Nail Art
Spring is in full bloom and so are these gorgeous nails. Salon System expert Natalie Farrow has shared with us a step by step on how to create these stunning French Florals to spice up your nail art skils the next time a client asks for a set of summery nails.
Step One
Prep the nails. File to shape, push back the cuticle and buff the nail plate. Cleanse nails with GELLUX Prep + Wipe, apply two coats of GELLUX Rose Pink Builder Gel as base, curing for 60 seconds between each layer.
Step Two
Apply GELLUX Purely White to create a half French and then, using a thin liner art brush, create a small line around the half French tip. Curing for 60 seconds.
Step Three
Using a liner art brush and a dotting tool, apply GELLUX Stoney Blue to create the first flower. Cure for 60 seconds.
Step Four
For the second flower, repeat step 3 and apply GELLUX Mini Pink Punch. Cure for 60 seconds.
Step Five
Next, for the third flower, using again a liner art brush and a dotting tool, repeat the same step as step 3 and 4 and apply GELLUX Mini Feelin Peachy, Cure for 60 seconds.
Step Six
Afterwards, apply GELLUX Vividly Violet to fill in any gaps to make a daisy. Cure for 60 seconds.
Step Seven
For this step, use GELLUX Jades A Gem to create the leaves, placing them abstractly around the flowers you have created. Then, use alternate colours for the centre of the daisies. Cure the nails for 60 seconds.
Step Eight
Next, apply GELLUX Feelin Peachy on the index fingers and GELLUX Stoney Blue on the little fingers. Afterwards, apply GELLUX Mirror Glaze Top Coat but, only on the ring fingers and middle fingers. Cure the nails for 60 seconds.
Step Nine
For that glossy finish, apply GELLUX Super Shiny Top Coat and set for 60 seconds. Then, wiping the sticky residue with GELLUX Prep + Wipe before applying cuticle oil to finish.

